CedarVent – Cross Ventilation Battens
CedarVent and CedarVent Plus are made of polyethylene plastic that is 2.375” wide X 3/8” thick X 36” long for maximum on the job installation flexibility. CedarVent Plus (Fabric factory attached) and CedarVent (no fabric attached) allows air to travel in all directions through the built-in corrugated air channels and acts as a rain and condensate screen allowing moisture to drain and evaporate behind the cedar.
Benefits
• 3/8” (Standard size) thick, strong & cost effective solution
• Easy to cut, easy to install & non-corrosive
• Provides the necessary air for cedar to breathe behind the wall or roof surface
• Convenient 3’ foot lengths for easy handling
• Can use power nail guns, will not crush
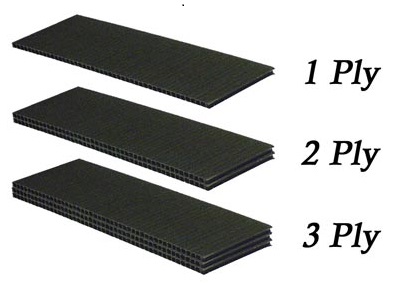
CedarVent is available in:
1 1/2” width (No weather fabric) 2 3/8” width ( With or without fabric)
| PLY – INCHES | 1 1/2″ WIDTH | 2 3/8″ WIDTH | 2 3/8″ WIDTH W/FABRIC |
| 1 – 1/8″ | YES | YES | NO |
| 2 – 3/8″ | YES | YES | YES |
| 3 – 1/2″ | YES | YES | YES |
| 4 – 3/4″ | YES | YES | YES |
Custom thickness available in both 1 1/2″ and 2 3/8″ widths
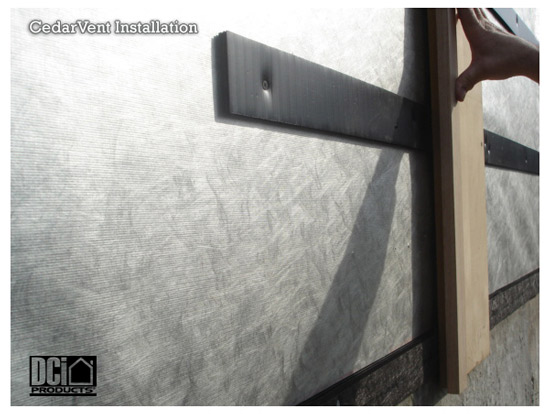
CedarVent installation instructions
After the roof/wall is prepared with a vapor barrier over the decking or plywood surface, install a strip of CedarVent around the perimeter* of the roof/wall surface (CedarVent Plus is available and comes with a factory applied fabric insect screen attached-generally used but not required at the perimeter of roofs and walls). Next, install CedarVent strips at the lower edge of the roof/wall parallel with the ground and centered at the nail lines, continue pieces butting each piece against the other until you reach the end. Next…
For roofing: Install the next parallel CedarVent up about 5″ or at the next nailing line for your cedar product being installed (CedarVent installs at the nail lines for your particular roof cedar product) and finally install SmartRidge at the roof ridge for ventilation. Your cedar roof is now properly ventilated with exhaust. If you need additional intake ventilation see our SmartVent product. (see note below)
For Wall: Nail CedarVent over existing vertical studs when installing cedar clapboards. For wall shakes nail CedarVent horizontal over plywood/osb panels and install at horizontal nail lines with cedar shakes. Optional to install CedarVent Plus at the bottom course for insect protection. (see note below)
* Note: Perimeter CedarVent on walls should be 3/8″ short of corner posts and soffits to allow air to escape. For roofs, CedarVent can hang over the edges 3/8″ on the perimeter rake and eave areas.
Click here to Download the installation Instructions
Less than an hour outside of New York City in the Hudson Valley are some amazing mansions that were built during the industrial age. The Lyndhurst mansion is one of them, but unfortunately had fallen in to disrepair. Over the course of six decades it has been brought back to its glory. When the focus turned to the historic bowling alley which lies along the property’s waterfront. CedarVent was needed as an essential part of the restoration to keep the cedar shingles ventilation and free from rot.
![]()
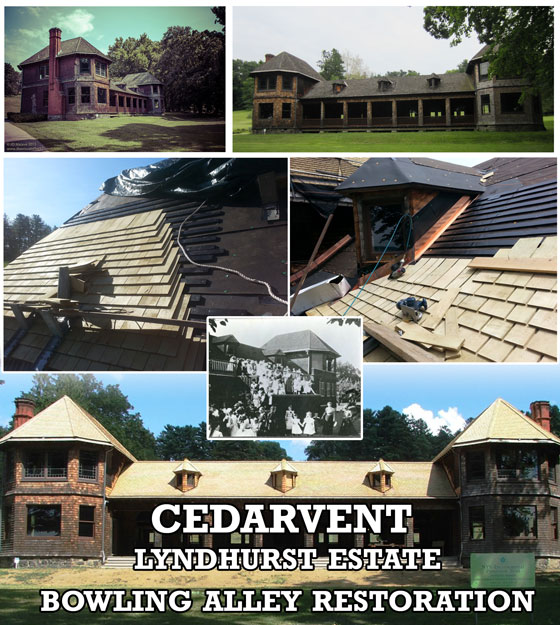
Considered one of the most beautiful estates in North America, the Lyndhurst estate is home to a 19th century private bowling alley once owned by one of the richest tycoons in the country. CedarVent was chosen to use as ventilation for this project to bring this recreational building back to its original beauty with modern technology. Here are some links about the project and also to the CedarVent portion of our website.
Preservation Leadership Forum: Lyndhurst Bowling Alley Roof – Restored and Improved

CedarVent featured in Coastal Contractor – March 2007
“Best-Practice Wall Shingles” ~Mike Guertin
Learn how CedarVent should be your ventilation choice when working with wall shingles.
Click here to read the article.
Fine Homebuilding Magazine addresses
cedar shingles and rainscreen with CedarVent
