SmartRidge Tapered End Caps
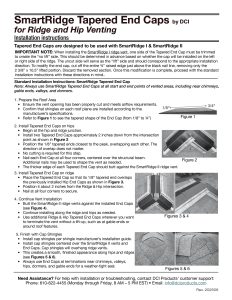
Installation instructions for how to install proper exhaust ventilation when working with a hip roof. This Tapered end cap is ideal for when dealing with obstructions on the the ridge. These tapered end caps provide a smooth transition and a clean ridge line.
Tapered End Caps are designed to be used with SmartRidge I & SmartRidge II
IMPORTANT NOTE: When installing the SmartRidge I ridge vent, one side of the Tapered End Cap must be trimmed to create the “no lift” side. This should be determined in advance based on whether the cap will be installed on the left or right side of the ridge. The uncut side will serve as the “lift” side and should correspond to the appropriate installation direction.
To modify the end cap, cut off the entire ¾” raised edge just above the black nail line, removing only the 2 3/8” x 10.5” lifted portion.
Discard the removed section. Once this modification is complete, proceed with the standard installation instructions with these directions in mind..

Figure 1.
1. Prepare the Roof Area
- Ensure the vent opening has been properly cut and meets airflow requirements.
- Confirm that shingles on each roof plane are installed according to the manufacturer’s specifications.
- Refer to Figure 1 to see the tapered shape of the End Cap (from 1/8” to ¾”)

Figure 2.
2. Install Tapered End Caps on hips
- Begin at the hip and ridge junction.
- Install two Tapered End Caps approximately 2 inches down from the intersection point as shown in Figure 2
- Position the 1/8” tapered ends closest to the peak, overlapping each other. The direction of overlap does not matter.
- No cutting is required for this step.
- Nail each End Cap at all four corners, centered over the structural beam. Additional nails may be used to shape the vent as needed.
- The thicker edge of each Tapered End Cap should butt against the SmartRidge II ridge vent.

Figure 3.
3. Install Tapered End Cap on ridge
- Place the Tapered End Cap so that its 1/8” tapered end overlaps the previously installed Hip End Caps as shown in Figure 3.
- Position it about 2 inches from the Ridge & Hip intersection.
- Nail at all four corners to secure.
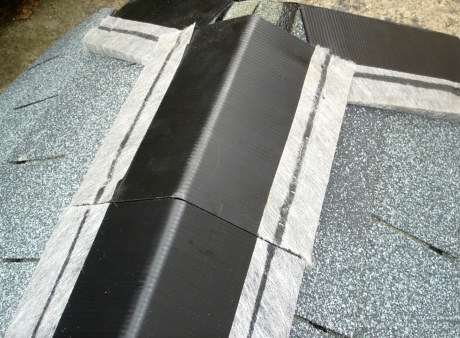
Figure 4.
4. Continue Vent Installation
- Butt the SmartRidge II ridge vents against the installed End Caps (see Figure 4).
- Continue installing along the ridge and hips as needed.
- Use additional Ridge & Hip Tapered End Caps wherever you want to terminate the vent without a lift-up, such as at gable ends or around roof features.
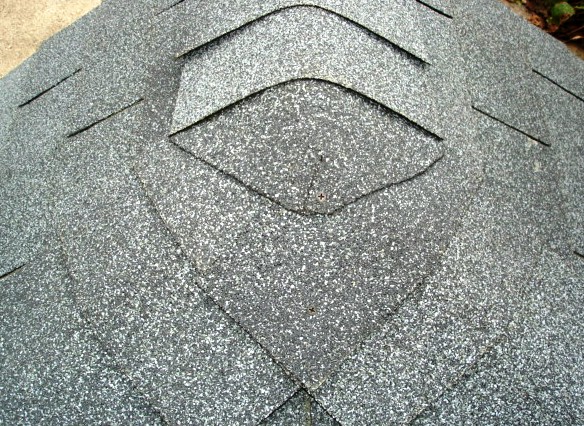
Figure 5.
5. Finish with Cap Shingles
- Install cap shingles per shingle manufacturer’s installation guide.
- Install cap shingles centered over the SmartRidge II vents and End Caps. Cap shingles will overhang ridge vents.
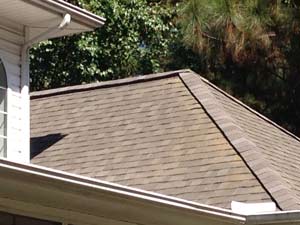
- This creates a smooth, finished appearance along hips and ridges (see Figures 5 & 6).
Always use End Caps at terminations near chimneys, valleys, hips, dormers, and gable ends for a weather-tight seal.
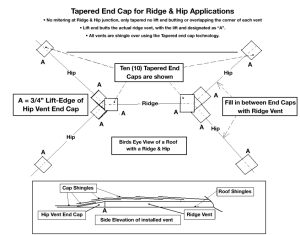
Tapered End Cap for Ridge & Hip Applications
- No mitering at Ridge & Hip junction, only tapered no lift end butting or overlapping the corner of each vent.
- Lift end butts the actual ridge vent, with the lift and designated as “A”.
- All vents are shingle over using the Tapered end cap technology.
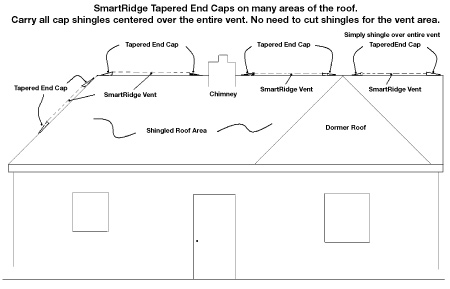
SmartRidge Tapered End Caps on many areas of the roof.
Carry all cap shingles centered over the entire vent. No need to cut shingles for the vent area.
- Remember that this Tapered End Cap requires no cutting.
- Nails should always penetrate through wood roofsheathing.
- Use on ridge and hips and also around dormers, chimneys, near valleys and at gable ends to hide swayback gable ends.?

