SmartVent – Eave Installation
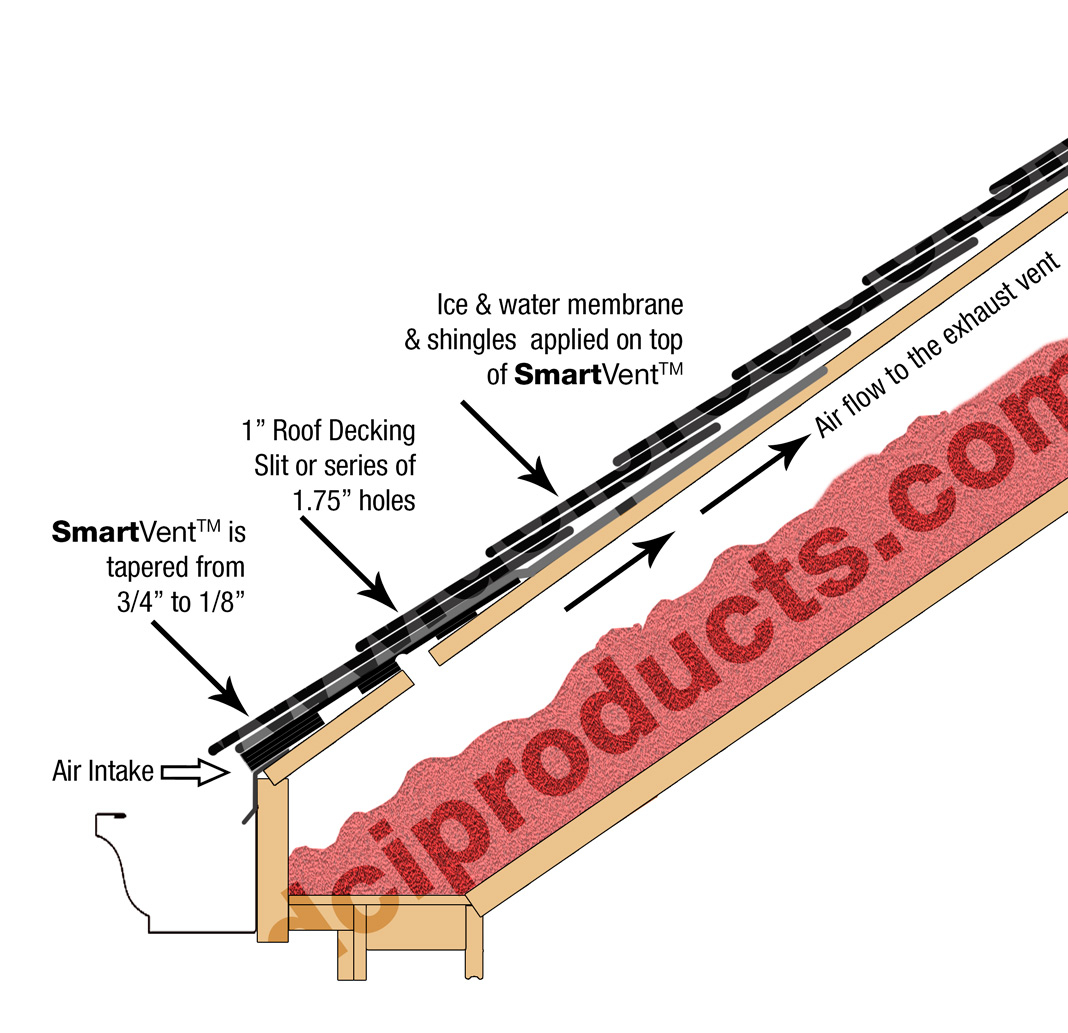 The ideal choice for intake ventilation when under eave intake is not allowed by county and state regulations or when soffits do not exist. The eave application is the first pioneered and most popular application of SmartVent.
Our patented design has revolutionized the roofing industry with regards to attic ventilation.
Patent numbers 6,212,833, 9,022,845 & 6,447,392 issued by the United States Patent & Trademark Office.
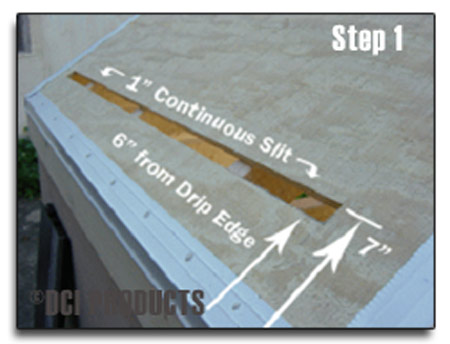
STEP 1 : Cut a slit 1” wide
Cut a slit 1” wide (or a series of 1 ¾” holes at 3” on-center) into the roof decking 6” to 7” up from the drip edge. SmartVent™ is rated 9NFA.
- Ensure drip edge has been installed.
- Do not cut slit within 12” of any side or valley/wall intersection, or any other obstruction.
- Do not cut into the rafters.
- Ensure insulation or other obstructions are not blocking the flow of air extending from the cut slit to the roof’s ridge, or other exhaust devices.
- Properly sized ridge or off ridge exhaust vents are required.
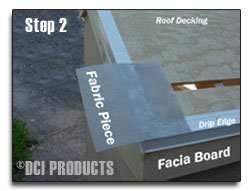
STEP 2 : Placing the Fabric
Place the fabric piece half way on the roof rake side edge and even along the drip edge. (Fabric sheets included in each box)
- Half of the fabric should hang over the rake side edge of the roof.
- Nail the fabric in place with 2 roofing nails, one high and one low.
- SmartVent™ Tapered End-Caps (sold separately) are available for terminating an installation prior to an obstruction such as a wall, chimney, hip, valley or pipe.
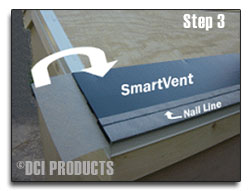
STEP 3 :
Lay the 3’ piece of SmartVent™ even with the drip edge and at the roof rake drip edges.
- Starting 2” from each end of the SmartVent™ piece, nail the SmartVent™ to the roof decking at the top edge with 4 nails spaced evenly.
- Nail the bottom with four nails matching the spacing from the top row of nails along the nail line.
- Each section requires a total of 8 nails (nails should be a minimum of 1 ½”, enough to penetrate through the roof decking).
- Wrap the end fabric tightly so it covers the outer edge of the SmartVent™ and nail it in place using two nails, one high and one low.
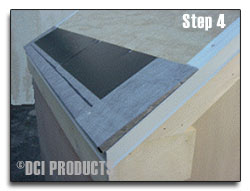
STEP 4 : Continuing Installation
Continue installing SmartVent™ until the last piece.
- Repeat steps 2 and 3 before laying the final SmartVent piece on the other end of the roof.
- SmartVent™ should align flush with rake fascia on all gable sides & wrapped with enclosed fabric as shown.
- 36” wide ice & water membrane gets installed as the next step over the SmartVent™ and against the upper wood roof deck.
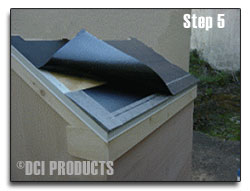
STEP 5 : Install ice and water membrane
Install ice and water membrane on top of the SmartVent™.
- Full width ice & water membrane (36”) is required to be installed over the SmartVent™ in all environments. Install ice & water membrane flush with lift edge of SmartVent™ and flush on rake edges.
- Ensure the upper underlayments are lapped over the lower underlayments/ice & water membrane at all areas of the roof.
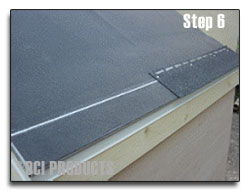
STEP 6 : Finishing with Fabric Square
Beginning with starter course, shingles must overhang SmartVent™ by at least ½” and no more than 1”.
Never install shingles flush with fabric edge on the eaves or rake edge.
Overhang shingle on rake edges by ½” or more.

Need to translate?
